Tuesday, December 25, 2007

Painting Smock for a Seven-Year-Old Horse Fan


What were you doing at 5:00 AM on Christmas morning? I was sewing this smock. Which I just finished, barely in time to run off to our Christmas gathering.

My niece found this fabric in my mom's old stashes. The pattern came from Bend-the-Rules Sewing, by Amy Karol. I think it took about an hour and a half for me to finish (that includes the requisite 20-30 minutes cursing at my sewing machine while I try to thread it.)

I have no wrapping paper and I'm leaving in an hour. Oops.

Merry Christmas!

Wednesday, December 19, 2007

Kitchen Sink Frittata


Another left-over post from December...I am mainly posting this (so late) as a reminder to myself: This is easy to make! And was good for taking in my lunches!

Okay - that's all I have to say on that...


- 9 eggs
- milk
- grated Parmesan cheese
- roasted potatoes
- roasted onions
- frozen spinach
- salt and pepper

8x8 baking dish, lightly greased. Oven to 350 degrees.

Apple Pie


Whoever says baking a pie is easy is lying. Or maybe they just have a reliable oven. This pie spent 2 hours baking. Every time I checked my oven thermometer, it was 100 degrees off in either direction, so I was constantly trying to get it close to what the recipe called for. Also, the crust was done 20 minutes after the pie went into the oven, which didn't help much.

I used the apple pie recipe from Baking Illustrated. They described a pie with good apple flavor (yes). They also said the filling would spread because they didn't want to dull the flavors with butter or thickener (true). In making this pie, I discovered the following:
1) I like pie filling to be thick
2) I like lots of spices

I used a mixture of granny smith apples and gala, and I really liked the combination. Next time I will use more granny smith, and less of the gala, because the gala was apple sauce by the time the granny smith was finished cooking. But I liked having the flavors of both.

Also, I used a store bought pie crust, which I will NEVER do again. I used Trader Joe's, and there was nothing bad about it, it just didn't compare to Martha's all-butter pate brisee, which I will definitely take the time to make the next time I make a pie.

This is a picture of Mt. Baker that I got out the car window on the drive home from Vancouver. For some reason I am quite fond of it:

Friday, December 7, 2007

Peppermint Cookies & Cream Brownies


Thank you, Baking Bites! I saw these brownies there, and they immediately went on my Must Try List. I have been a sucker for Peppermint Jo-Jo's since I tried them last year, and nothing is better than a brownie...

I pretty much followed the recipe to the letter, but I will copy an abbreviated version here. They were every bit as fabulous as I was hoping - I especially liked how the slightly salty cookie bits contrasted with the brownie. Next time (there will definitely be a next time!) I will experiment with less sugar, because they were tooth-achingly sweet. I will also try adding a bit of peppermint extract to the brownie batter, just because you can't have too much peppermint in my book.


Peppermint Cookies & Cream Brownies, from Baking Bites

- 1 cup butter
- 6 oz unsweetened chocolate
- 3 cups sugar
- 3/4 tsp salt (original recipe called for 1/2 tsp)
- 2 tsp vanilla extract
- 4 eggs
- 1 2/3 cups flour
- 1/3 cup cocoa powder
- 18 Peppermint Jo-Jo's, roughly chopped, plus 4 more to sprinkle on top

Oven to 350F. Line a 9×13-inch baking pan with aluminum foil or parchment, lightly grease if using foil.
Melt together butter and chocolate. Remove from heat and stir in sugar, salt and vanilla. Add eggs one at a time. Stir in flour and cocoa powder. Stir in Peppermint Jo-Jo's. Pour batter into prepared pan. Sprinkle 4 additional chopped cookies over batter.
Bake for 25-35 minutes, until a toothpick comes out with crumbs.

Here are the brownies packed up and ready to LEAVE THE PREMISES. Otherwise I will end up in a sugar coma - there is no hope for restraint with these in my apartment, so out they go.

PS - These brownies are definitely in the fudgy camp (as opposed to chewy or cakey).

Tuesday, December 4, 2007

Sorry...more brussels sprouts


A couple of weeks ago while eating out, I had some amazing brussels sprouts. They were roasted with bleu cheese and hazelnuts. I wanted to try duplicating them at home, but decided I needed to use up some left-over goat cheese I had in my fridge. It was good, and definitely repeat-worthy. (But bleu cheese would have been better.)

I tossed the sprouts with olive oil, salt, and pepper, then spread them face down on a baking sheet with the hazelnuts. I stuck them in a 400 degree oven until they were done, then scattered the goat cheese on top.

PS - It snowed this weekend! (In case you are wondering, that is unusual for Seattle.)

Saturday, November 24, 2007

Squash+Figs+Goat Cheese=YUM.


I truly meant to follow the recipe this time. I even made a special trip to the grocery store to make sure I would have all of the ingredients. And yet, I STILL managed to get home missing three things for the soup and a fourth ingredient for the compote... However, this turned out to be a happy accident, because I cannot imagine improving on how either the soup or compote turned out.

The fig compote came from the December 2007 issue of Food. The original version called for thyme, which I didn't have on hand, but I did not miss it!

Fig Compote
- 1/2 cup chopped dried Mission figs
- 1 cup red wine
- 1/4 cup brown sugar
- pinch of salt

Boil in a saucepan until reduced and thickened. Cool to room temperature and serve on toast with goat cheese (with squash soup, if available).

The original soup recipe came from the November 2007 issue of Cooking Light. In addition to the missing ingredients, it called for putting the soup through a blender before serving. I don't have a blender, and couldn't really be bothered anyway. Instead I cooked it down a little longer on the stove. It turned out smooth with tasty chunks of squash. Yes, it looks like unappetizing babyfood, but I think that is true of most squash soup; I'm not sure it can be helped.

Squash Soup
- 5 cups water
- two bouillon cubes *please see note below
- 3/4 cup applesauce
- about 2 Tbsp molasses
- 1 butternut squash
- 1 acorn squash
- 1 large onion
- canola oil
- half-and-half

Oven to 400 degrees. Cut the squashes in half, clean out their seeds (save them to toast later). Place halves face down on baking sheet lined with parchment. Coarsely chop the onion, drizzle with canola oil, and spread out onto baking sheet with squashes. Bake until squash is soft (40 minutes? 50? I don't remember.)
Next, add water to soup pot and bring to boil. Add bouillon. When the squash is cool enough to handle, scoop out the insides and add to soup pot, along with the onions. Simmer until soup is at desired consistency, then add applesauce, molasses to taste, and half-and-half to taste (I think I used about 1/3 cup?).

*This is what I used - I did not add any additional herbs or salt, and the soup was perfect, so I guess I have to thank my bouillon...

Thursday, November 22, 2007

Brussels Sprouts and Sweet Potato Fries

Happy Thanksgiving! It is six A.M., it is 32 degrees outside, and I am about to head to work...That's right - I will be spending my Thanksgiving at the hospital. For some reason I enjoy being at work during the holidays. It sort of reminds me of being a kid, and going to school at night for a school play or something.(?) Any-hoo, I still need to get my fix of Thanksgiving food:

I love brussels sprouts! These were tossed with melted butter, pecans, salt, and pepper, then roasted in an oven set at about 400 degrees until the were done (browning on the bottom). I had some sweet potatoes that I threw in too. They were good, but nothing compares to brussels sprouts...

Thursday, November 15, 2007

A Perfect Night In (guitar, knitting, and Whole Wheat Chocolate Chip Cookies)

It was so rainy today that it got dark earlier than usual (even for Seattle in November). I finished my grocery shopping, came home, and cozied up for the evening.

I am not going to write out the whole recipe for these cookies - I used the one that has been printed on the Nestle chocolate chip bag since forever. I just used whole wheat pastry flour instead of all purpose. I couldn't tell a difference.

Stuffed Pumpkin

I found it difficult to photograph this - something about the Israeli couscous looks a little icky in pictures...
But it tasted really good, and was incredibly easy, so here is the "recipe" (as usual, I don't remember any specifics...)

Stuffed Pumpkin

- a small pumkpin (the kind meant for eating, not carving)
- vegetable broth
- couscous
- tart cherries
- anything else that sounds good (Carrie - I'm sure it would be good with some roasted root veggies thrown in at the last minute?)

I took the top off the pumpkin and emptied it (keeping the seeds for toasting, of course). I think I had the oven pretty hot, around 400 degrees. I put the pumpkin on a baking sheet, then poured hot vegetable broth inside, and stuck the pumpkin in the oven for awhile. When the pumpkin started to seem cooked, I added the couscous and the cherries, then cooked the pumpkin a while longer, until the couscous was done.

One pumpkin made enough for my dinner, and then lunch the next day. The pumpkin become really soft and savory cooked in the vegetable broth, and you can scoop bites of pumpkin out with the couscous. Yum!

Tuesday, November 13, 2007

Chocolate Pudding

Seriously - chocolate pudding. This is not something I would normally crave. I'm sure it has been years since I have even eaten pudding. But I got a hankering, and then my curiosity took over (how do you make that stuff, anyway?!)

It turns out it is easy and yummy and now I wish I had more. It was a little too sweet for my taste, so I may experiment with less sugar next time, but otherwise I had no complaints - it was exactly what I would want chocolate pudding to taste like.

Chocolate Pudding, slightly modified from Better Homes and Gardens New Cook Book

- 3/4 cup sugar
- 1/3 cup cocoa powder
- 2 Tbsp cornstarch
- 1/8 tsp salt
- 2 2/3 cups milk (I used 1%)
- 4 egg yolks, whisked
- 1 Tbsp butter
- 1 1/2 tsp vanilla

Put sugar, cornstarch, cocoa powder, and salt in medium saucepan, and mix together. Add milk, and heat over medium, stirring constantly, until beginning to bubble and thicken - cook for two more minutes, continuing to stir. Remove from heat. Gradually stir 1 cup of the milk mixture into the egg yolks, then return egg and milk mixture to saucepan. Continue stirring over medium heat until it comes to a very gentle boil; cook for two more minutes. Remove from heat and add butter and vanilla. Mix well, then pour through fine mesh strainer into bowl and cover with plastic wrap pressed to surface to chill.

Saturday, November 10, 2007

Finally Sewing!


Certain crafts can be challenging to the urban dweller; sewing is one of them. No matter how efficient you are, you still need a wide open space to spread out. For that reason, my sewing machine has been gathering dust for quite some time (the fact that I usually end up yelling curse words whenever I use it probably didn't help.)


Well, I finally have a set-up that will work in my tiny apartment! I christened it by making an apron for my nephew. It is the Vintage Apron out of Bend-the-Rules Sewing, by Amy Karol. I still wound up yelling curse words, but I made it to the end with something resembling an apron. And the best part is that I am still feeling inspiring to try something else!

Sunday, November 4, 2007

Chocolate Banana Muffins


Every time I make something with whole wheat pastry flour, I have to ask myself why I don't just use it all the time. I have never had a recipe go bad by replacing it for all purpose. This is another example. These muffins are chocolate-banana heaven. They called for all purpose, and I swapped in exactly the same amount of whole wheat pastry flour. The muffins are soft and cakey and chocolately. I made them yesterday, and then I accidentally left them out all night without wrapping them up, and they were still still moist and yummy this morning.

Chocolate Banana Muffins, modified from a recipe in the 2002 issue of Martha Stewart's Holiday Baking magazine

- 1/4 cup melted butter
- 3 ripe mashed bananas
- 1 1/2 tsp vanilla
- 3 eggs
- 3/4 cup buttermilk
- 1 1/2 cups whole wheat pastry flour
- 1 cup and 2 Tbsp sugar
- 3/4 cup cocoa powder
- 2 1/4 tsp baking powder
- 1/4 tsp baking soda
- 1/4 tsp salt

Oven to 375 degrees, line a 12-cup muffin tin with muffin papers. Mix together flour, sugar, cocoa, baking powder, baking soda, and salt in a small bowl. In a large bowl whisk together bananas, vanilla, buttermilk, butter, and eggs. Mix dry ingredients into wet using a wooden spoon, then fill muffin tin (I had extra batter left over - enough to make a couple more muffins.) Bake for 20-25 minutes, until toothpick is clean with just a few crumbs.

Cranberry Sauce


I love cranberries! This time of year I am always looking for anything that I can possibly eat with cranberry sauce - in this picture it is greek style yogurt with honey. Yum. I made this cranberry sauce using one bag of fresh cranberries (12 or 14 ounce? Whatever the standard bag is.) I simmered the cranberries for about ten minutes with 3/4 cup of water, a sprinkling (1 tsp?) of corn starch, and about 1/4 - 1/3 cup of Wax Orchards Fruit Sweet, which is basically just concentrated apple juice. It is sweet enough to eat straight out of a bowl, but just barely.

Sunday, October 21, 2007

The Easiest Biscuits in the World


I'm beginning to feel like an advertisement for this book:Baking Illustrated: the Practical Kitchen Companion for the Home Baker, by the Editors of Cook's Illustrated Magazine. Almost anytime I try something for the first time, I will turn to this book, and I'm pretty sure it has never led me astray.

This is another example. I haven't made biscuits in years, and decided to give it a try yesterday morning. When I turned to my baking bible, there were two recipes listed - one was pretty traditional, with cold butter cut into the flour. But this one was the easy version, and instead of butter, it uses only heavy cream. I was intrigued and gave them a try. They were indeed incredibly easy to make, and they were actually really good! The texture was crispy on the outside, soft and flakey on the inside. I must confess, I am not a true connaisseur of biscuits, but I can't imagine ever using another recipe (and the other folks at the breakfast table didn't seem to have any complaints either.)


Cream Biscuits, from Baking Illustrated: the Practical Kitchen Companion for the Home Baker, by the Editors of Cook's Illustrated Magazine.

- 2 cups flour
- 2 tsp sugar
- 2 tsp baking powder
- 1/2 tsp salt
- 1 1/2 cups heavy cream

Oven to 425 degrees and line a rimmed baking sheet with parchment.

Whisk together dry ingredients, then stir in only 1 1/4 cups of the heavy cream with a wooden spoon. When the dough comes together, dump it onto a lightly floured countertop, and then use small amounts of the remaining cream to moisten the dry bits left in the bowl. Add these to the dough and knead briefly until smooth. Pat dough to 3/4 inch thickness and cut out biscuits. Bake for about 15 minutes.


PS - I discovered that this recipe works great for dumplings in a pot of veggie soup. I halved the recipe, which worked well. I also used half-and-half in place of the cream, because that was all I had around, and it worked fine. Just make sure not to crowd the dumplings too much, or else you may end up with little under-cooked spots.

Thursday, October 18, 2007

My first embroidery project

DANGER:This stuff only costs THIRTY cents a skein.


It is sold in a zillion beautiful colors which are enticingly displayed at the store. I think it is going to require an enormous amount of willpower to keep from getting over-run with this stuff.

A new/old friend of mine has recently inspired me to try embroidery. I found this book,Doodle Stitching, and instantly went out and bought needles, thread, a hoop, and a few pieces of craft felt. (As I mentioned, this is a VERY inexpensive hobby.) Then I proceeded to get a horrible cold, and have spent the last day and a half on my couch, with my new hobby!

The bird pattern I tried came out of a project in the book. When I got started on it I really didn't have a plan. As a result, the embroidery is not placed on the fabric in a way that lends itself to much. Let me know if you have any ideas. I will probably just turn it into a small bag or something.

Thursday, October 11, 2007

Mexican Wedding Cakes

These were another request from my Bosnian friend. He was very concerned that I would try and sneak frosting on them, "You Americans put frosting on everything!" Yes, I am guilty! But I reassured him that even I could resist frosting Mexican Wedding Cakes.


When I started baking these I realized I didn't have half the ingredients that the original recipe called for, so I ended up mixing pecans with almond meal. They actually turned out great anyways - very nutty!

(More of the view out my kitchen window. The other day I glanced up and saw that the air outside looked yellow - it was super weird. This was the view to the east. This picture doesn't do it justice, but it was the best I could do. The sky was black, the air was yellow, and there was that stripe of royal blue peeking out from under the clouds.)


Mexican Wedding Cakes

- 1 cup chopped toasted pecans
- 3/4 cups almond meal (toasted in 325 degree oven for about 5 minutes)
- 3/4 tsp salt
- 2 sticks of salted butter, softened but still cool
- 1/3 cup sugar
- 1 1/2 tsp vanilla
- 1/2 tsp almond extract
- powdered sugar for dusting cookies

Oven to 325 degrees. Line baking sheets with parchment paper. In a small bowl mix pecans, almond meal, salt, and flour together. In the bowl of a mixer, beat butter and sugar together until fluffy, then add vanilla and almond extracts. Add flour mixture and beat until just combined. Using 1 Tbsp of dough, roll into balls and place on cookie sheets. Bake for 16-20 minutes, until cookies are beginning to brown on the bottom and turn golden on the tops. Cool to room temperature before rolling in powdered sugar.

Sunday, October 7, 2007

Pumpkin Cookies with Orange Frosting


For as long as I can remember, my mother has been making these cookies, only as a banana version with lemon frosting. We have no idea where the recipe came from, but I remember eating them when we still lived in Houston (in other words, a very long time ago.) I have wondered how they would be with pumpkin instead, and finally gave it a try today. My experiment was successful! They are like tiny little pumpkin cakes - they are incredibly soft and spicy and made my apartment smell delicious. They would be lovely on their own, but I can never resist frosting...

(I have been enjoying the ledge outside my kitchen this fall - the ivy finally reached my window!)

Pumpkin Cookies

- 1/2 cup butter, room temperature
- 1 cup brown sugar
- 2 eggs
- 1 cup canned pumpkin
- 2 cups flour (The flour can be replaced with 2 cups of whole wheat pastry flour, or with quinoa flour for gluten-free cookies. Both work really well with this recipe, and still give you soft, cakey cookies.)
- 2 tsp baking powder
- 1/4 tsp baking soda
- 1/4 tsp salt
- 1 tsp pumpkin pie spice (I will use a little more next time)
* If you want to do the banana version instead, use 1 cup of smashed banana (about 2 large bananas), and replace the pumpkin pie spice with 1/2 tsp cinnamon and 1/4 tsp cloves.)

Oven to 375 degrees. Mix dry ingredients well in a small bowl. Beat sugar and butter in a large bowl until fluffy, then add eggs and pumpkin. Mix well, then add dry ingredients. Drop in heaping tablespoons (or use a smallish ice cream scoop) on cookie sheet, and bake for 8-10 minutes until firm to the touch, or a toothpick comes out clean. Cool completely before frosting.

Frosting

- 1/3 cup butter at room temperature
- 2-3 cups powdered sugar
- zest of 1 orange
- 2-3 Tbsp orange juice

Beat until fluffy. Spread on cooled cookies.

A Shared Present

Finally - I finally got to try them! I've been reading about salty caramels forever, but couldn't bring myself to fork out the dollars to try them. However, my mom received some as a gift and was kind enough to share. Yay! The reason I have been so drawn to these is because 1) I LOVE chocolate and caramel, and 2) I love chocolate and salt (particularly in the form of Chubby Hubby Ice Cream, or World Peace Cookies.) Therefore, chocolate, salt, and caramel all in one should be pretty good, right? Yes! Very tasty, with a very satisfying crunch to go along with it. The one change I would make to these would be to distribute the salt more evenly on the candy (I realize that would decrease the cute factor, but it would be nice for those of us that like to take small bites...)

Tuesday, October 2, 2007

Chocolate Sandwich Cookies


I got the recipe for these cookies from Smitten Kitchen. She mentions that she uses less sugar than the original recipe calls for, and I used the lower amount too. But the next time I make these, I will probably experiment with using even less. The cookies were still very sweet, and left me craving that saltiness you get with Oreos (my brother mentioned the same thing). I also used salted butter, and used a generous 1/4 tsp of salt - I would probably increase that slightly too. However, these were still very good, and I will definitely be making them again!

Chocolate Sandwich Cookies

Cookies:

- 1 1/4 cups flour
- 1/2 cup cocoa
- 1 tsp baking soda
- 1/4 tsp baking powder
- 1/4 tsp salt
- 1 cup sugar
- 10 Tbsp butter at room temperature
- 1 egg

Filling:

- 4 Tbsp butter at room temperature
- 1/4 cup vegetable shortening
- 2 cups powdered sugar
- 2 tsp vanilla

Oven to 375 degrees. In a food processor or an electric mixer, mix the dry ingredients, including sugar. On low speed, add the butter, and then the egg. Mix until dough comes together. Place rounded teaspoons of dough on cookie sheets and flatten the dough slightly with damp hands. Bake for 9 minutes, rotating trays half-way through. Cool cookies on baking sheets on wire rack.

Meanwhile make the filling:
Mix butter and shortening, then gradually beat in the sugar and vanilla. Mix on high until light and fluffy, about 3 minutes.

Assemble cookies using about 1 tsp of filling per sandwich.

Sunday, September 23, 2007

Blondies


This will be a quick post. All I will say is that it doesn't get any better than these.. They are easy to make with no advance notice. Their texture is chewy, and the nuts get even toastier and crunchier in the oven. The white chocolate is very important - they take on the butterscotch flavor of the butter and brown sugar. I have made this recipe so many times I know it by heart. I'm pretty sure I haven't made a single batch of chocolate chip cookies since finding this recipe - these are the perfect combination of chocolate chip cookie and brownie.

Blondies, from Baking Illustrated: the Practical Kitchen Companion for the Home Baker, by the Editors of Cook's Illustrated Magazine.

- 1 1/2 cups flour
- 1 tsp baking powder
- 1/2 tsp salt
- 12 Tbsp butter, melted and cooled in a large saucepan
- 1 1/2 cups brown sugar
- 2 eggs
- 1 1/2 tsp vanilla
- 1/2 cup chocolate chips
- 1/2 cup white chocolate chips
- 1 cup chopped and toasted pecans

Oven to 350 degrees; 13 x 9 inch pan lined with parchment, parchment sprayed with cooking spray.

Mix the flour, baking powder, and salt together in a small bowl. Mix the brown sugar into the melted butter, then add the eggs and vanilla. Fold in the dry ingredients until just combined. Stir in the chocolate chips and spread the batter into the pan. Sprinkle the pecans on top. Bake until the top is shiny, possibly cracked, and feels firm to the touch, about 22-25 minutes. Cool in pan on wire wrack.

Thursday, September 20, 2007

Parmesan French Toast with Zucchini, Squash, and Tomatoes

I seem to be doing a lot of complaining about the weather lately, so before I get to my french toast, I need to mention how much I love Fall in Seattle! The weather is totally unpredictable, and can change at a moment's notice. After a sunny day today, the clouds just rolled in about an hour ago. Now there is a flat, grey haze over everything. Leaves are starting to turn amazing colors, and there is a bite in the air. It is cold enough to need a sweater and a jacket. All of this just makes for really good baking weather. (Blondies, actually. I will post about them soon.)

I took the photo below Tuesday night. I was on my way to a lecture on "perspective" at Gage. When the black clouds in the distance finally arrived, they brought a few flashes of lightening, but no rain.


Okay - french toast... I love french toast. I was craving it today, but my sweet tooth wasn't present at the time. This was the result:

French Toast

- eggs
- milk
- pepper
- finely grated parmesan cheese
- good crusty bread

Whisk eggs, milk, pepper, and parmesan together in a bowl. Dip bread into egg mixture, and fry in a pan on medium heat until cooked all the way through.

Sauteed Veggies

- zucchini, chopped
- squash, chopped
- cherry tomatoes, left whole
- butter
- herbs
- salt

Saute everything until done to your liking; serve atop french toast, with a spoonful of sour cream or plain Greek-style yogurt.

Tuesday, September 18, 2007

Coconut Cookies with Lemon Icing


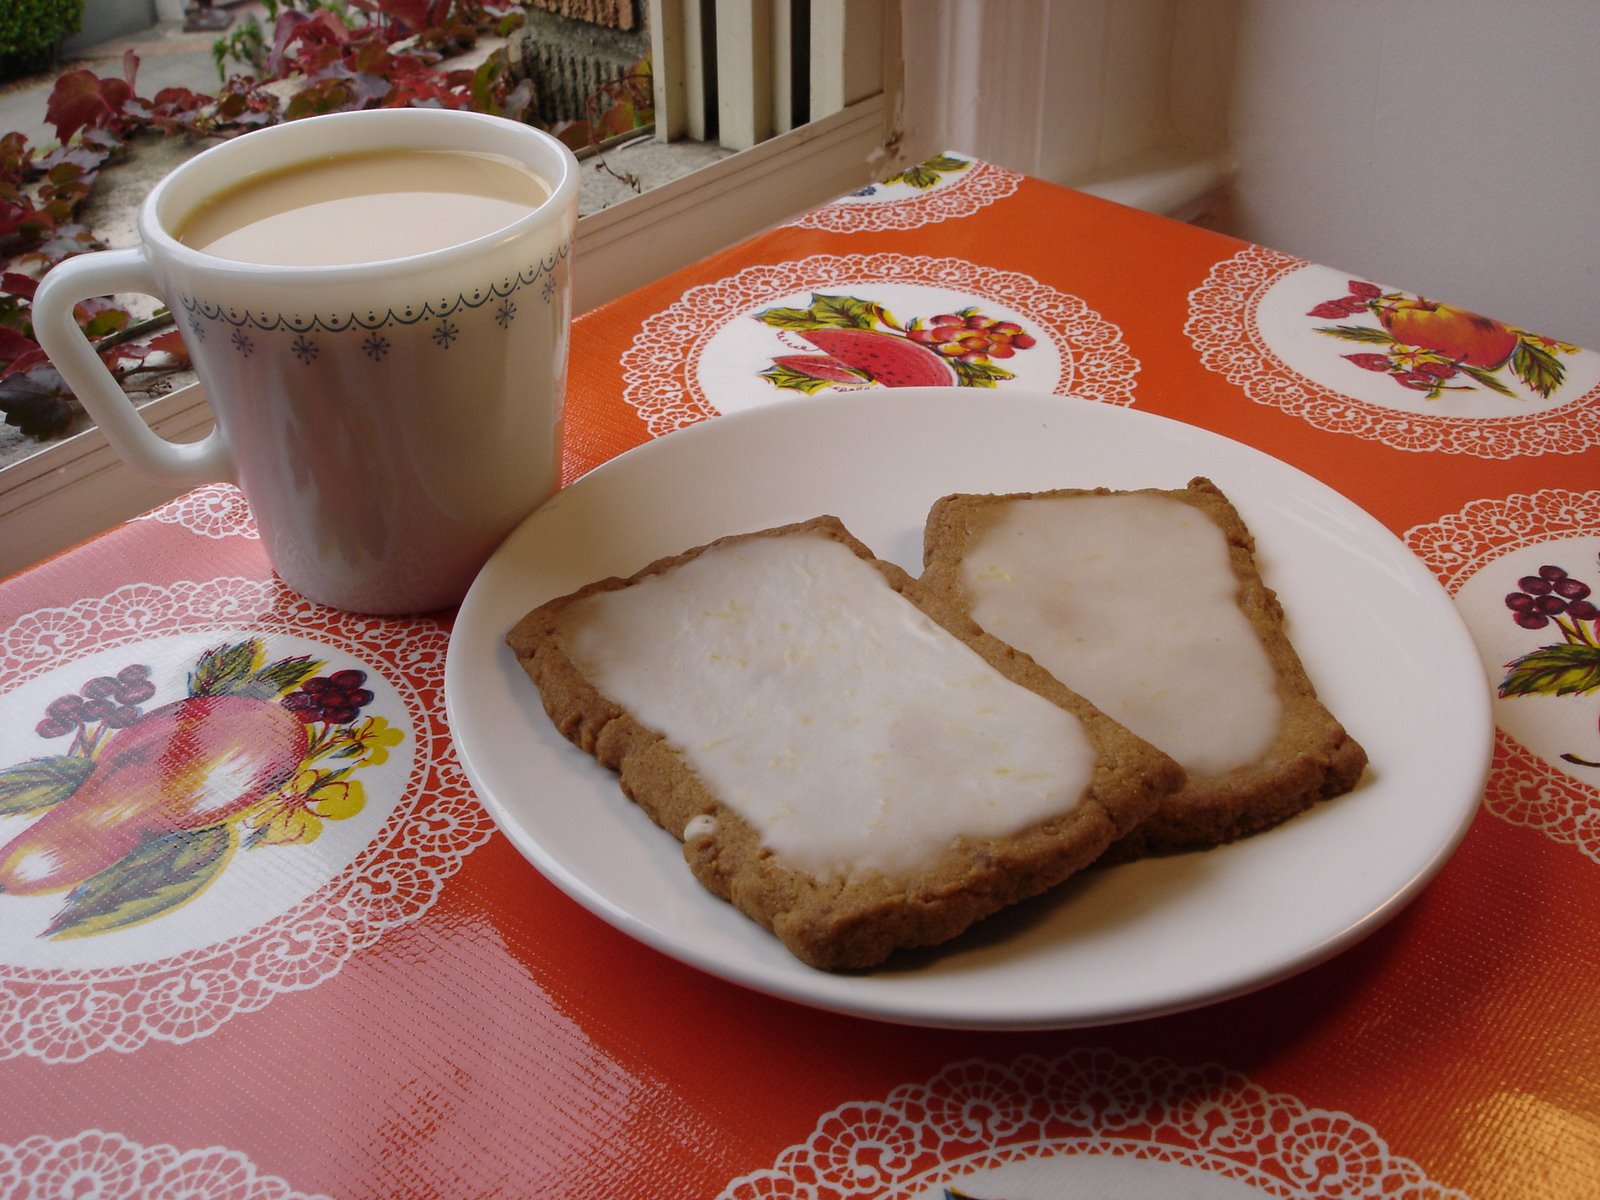
Please notice how dark it is in these photographs...all of a sudden I am finding myself getting ready for work in the middle of the night. When did that happen?! I made these cookies late in the evening, and figured I would photograph them in the morning before taking them to work so I could have better light. Apparently that won't be an option anymore. Luckily I left two cookies at home, and got a couple more pictures the next day.


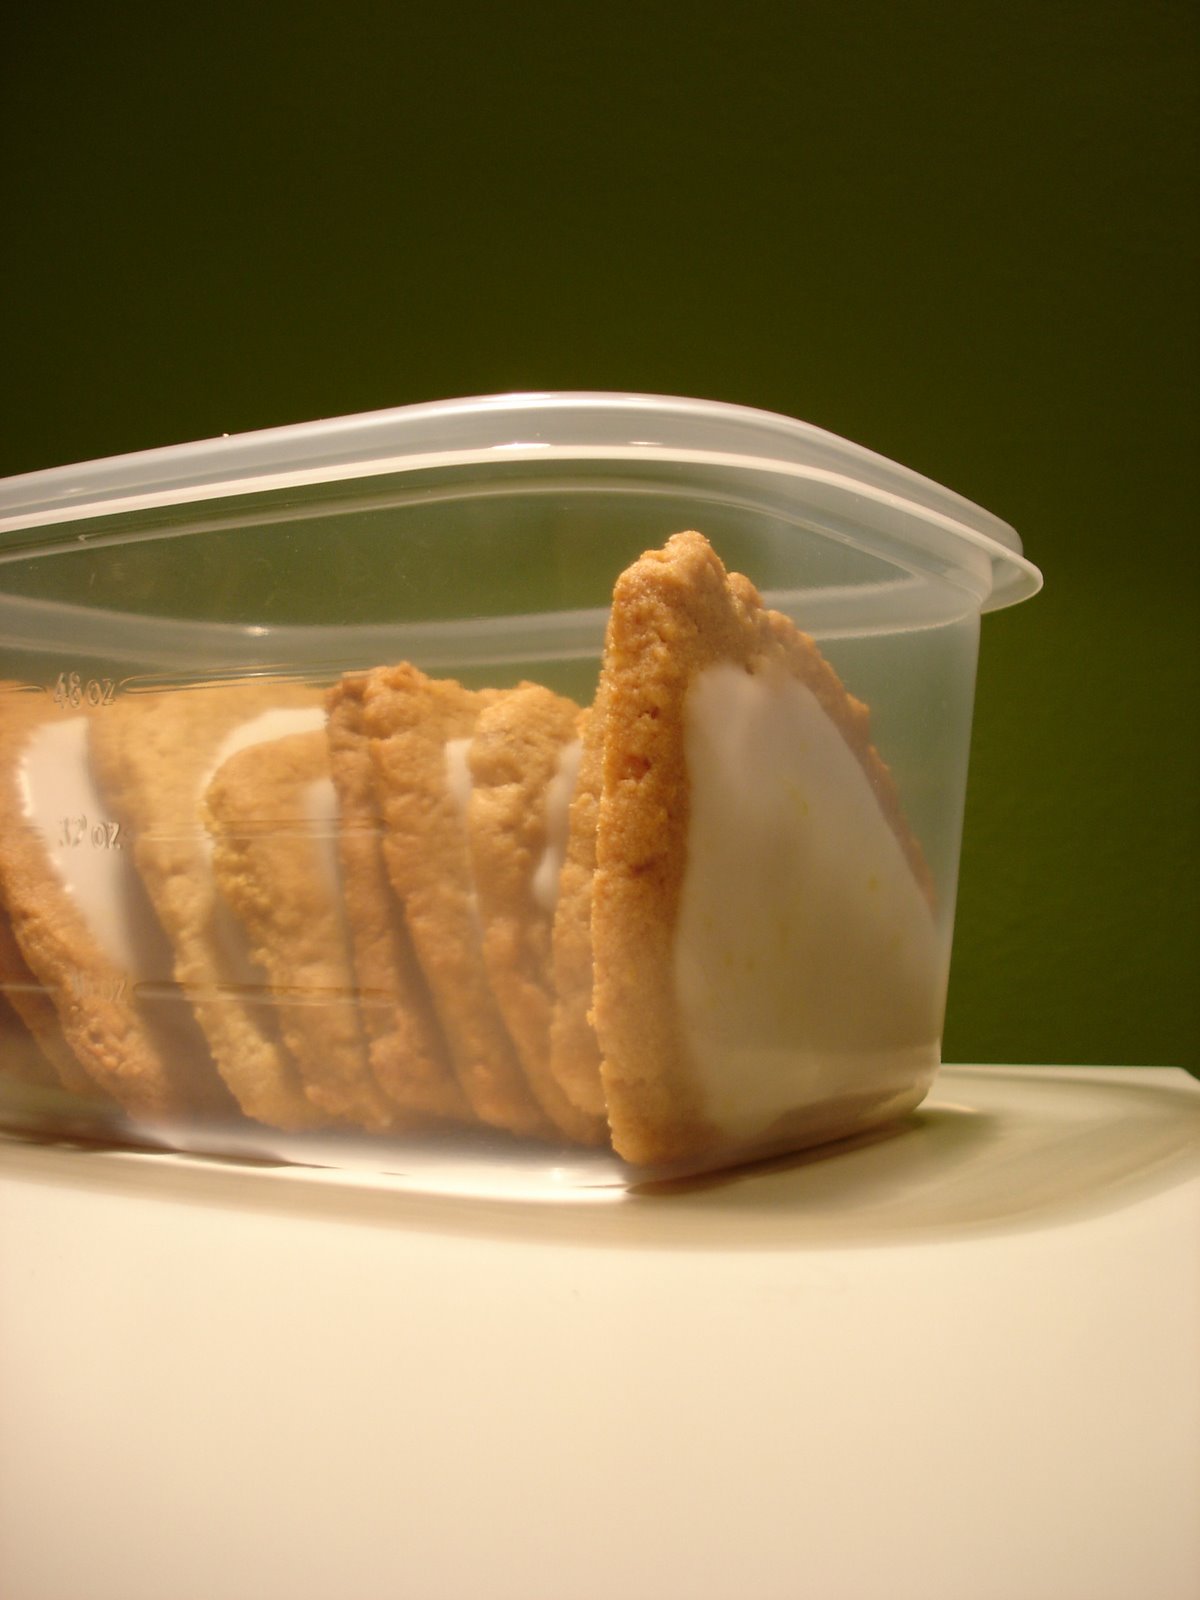
I have future plans for these cookies. I could never duplicate them exactly even if I wanted to because there were so many mishaps, (such as tripping while measuring in the almond extract.) But the fact of the matter is that they were too labor intensive with the rolling, etc, anyway. I am thinking they might work as a refrigerator slice and bake cookies, with more spices to go with the cinnamon, and then sandwich them with something creamy. Okay, I will confess, I secretly want to duplicate Mother's Taffy Sandwich Cookies. I think these are on the right track, and I will revisit them the next time I am inspired to work on this endeavor. But that may be awhile, because now I also have major negative associations with these cookies. I took them to work, and ate one-too-many, which left me feeling a little gross late in the afternoon. Then my day proceeded to turn into one of my Top 3 Most Sad and Heinous Days At Work Ever. I almost couldn't bring myself to post about these cookies because of it, but really, they are just cookies, and good ones at that. So here they are.

The original recipe came from Big Fat Cookies, by Elinor Klivans. The unadulterated cookies were fabulous - nice and crispy-crunchy. And they tasted wonderful with the lemon icing, but it caused them to become chewy cookies, which is not what I wanted at all. Does anyone out there know how to avoid that in the future? I want a frosted cookie that is also crunchy...

Toasted Coconut Washboards

- 1 1/2 cups sweetened shredded coconut, toasted in a 300 degree oven for about 10 minutes (stir occasionally, and watch closely)
- 2 cups flour
- 3/4 tsp baking powder
- heaping 1/8 tsp salt
- 1/2 tsp cinnamon (I used 1/4 tsp, and regretted reducing it)
- 3/4 cup butter at room temperature
- 1 cup packed brown sugar
- 1 egg
- 1 tsp vanilla
- 1/2 tsp almond extract

Oven to 350 degrees. Mix together dry ingredients in a medium bowl. Beat together butter and brown sugar until fluffy, then add the egg, vanilla, and almond extract, and beat until blended. Mix in flour, then coconut.

The dough is soft, and the recipe calls for rolling it to 1/4 inch thickness between sheets of wax paper, then slicing the cookies into rectangles, and transferring the cookies to the cookie sheets. I did it, but I won't be doing it again. It was a royal pain in the ass. Bake until edges are golden, about 15 minutes. Cool on sheet for 5 minutes before transferring to wire rack.

Lemon Icing

- lemon juice
- lemon zest
- powdered sugar

Mix until spreadable, and spread on cookies.

Mittens

I just heard on the radio that it is 49 degrees outside.

Anyway...I thought I had already posted about these mittens, but I'm not seeing the post anywhere, so here they are (again?). They were my first successful attempt at knitting something that wasn't a square. The pattern is Heather Dixon's "Valentine's Hat & Mittens" from Stitch 'n Bitch Nation by Debbie Stoller. In the end I was surprised at how easy it was to make something with so many corners and turns. I still wasn't happy with my finishing though - there are little knots poking out all over the place.

The yarn is Brown Sheep Lamb's Pride Bulky. I'm fairly certain that this yarn was purchased in either 1992 or 1993. I bought the grey for a sweater vest(?!) that I gave up on after two disasters (involving a LOT of frogging.) Nina Roux, my roommate at the time, bought the brown. I don't remember what she had planned for the stuff, but it was still tidy in its original skeins when she finally passed it on to me about five years ago.

Wednesday, September 12, 2007

Found: A Good Cup of Tea!

I do like coffee, and an Americano with cream and sugar can certainly hit the spot. However, nothing compares to a good cup of tea. But in this town of endless cafes, a good cup of tea seems next to impossible to find! Tea in coffee shops is usually weak and flavorless, one tiny tea bag to 12 ounces of hot water. Or sometimes you may get a really expensive pot of tea that is no better, and the pot is usually served with a tiny, wide-mouthed mug that causes the tea to become tepid moments after you have doctored it with cream and sugar. Years ago I travelled through Ireland, Wales, and England with my choir, and one of my best memories of that trip was the amazing tea that you got with every breakfast. It was strong and hot and could hold its cream and sugar!


The other day I was wandering through Pike Place Market, and came upon the Crumpet Shop. I've seen this place a million times in the million years that I have lived in Seattle, and it never occured to me to go in before. But today I was having a bit of a sweet tooth and decided to give it a try. Hurray! Not only was the tea as good as the stuff I had in England, but there are free refills, the mugs were the proper shape and size, AND I got to drink it with one of my new favorite foods - a crumpet!

The crumpet was steamy on the inside, and crispy-chewy on the outside. The dough was almost salty which went well with ricotta cheese and blackberry preserves. And my Earl Grey tea.